Showing posts with label DIY. Show all posts

Sunday, June 14, 2015

Baby Bib Tutorial (0-3 Months)

I feel like there's a "newborn" version readily available in just about EVERYTHING... but I've noticed that it's really hard to find bibs that are made for smaller babies.  With both of my children, I would put a "one size" bib to contain their "spit up" and they'd end up with a ring of dampness around the neck line of their clothing before anything even touched the bib... Annoying.

My solution?  Make my own bibs!  While I will definitely NOT claim to be an expert seamstress (very far from it, actually),  bibs are super easy to put together, even for a novice.  You can "upcycle" bibs using materials already in your home (ecofriendly!), and nothing but a simple straight stitch on the most basic of sewing machines will do!


You'll need a few things to put this together, so we'll start there:
  • Sewing Machine, threaded and ready to go
  • Scissors (preferably fabric scissors)
  • Paper & Washable marker or fabric pen
  • Cotton fabric & Water resistant or absorbent fabric
  • Pins or clamps to hold your fabric together
  • 0-3 Month Bib Pattern

Pattern 

I've uploaded my 0-3 Month Bib Pattern in PDF format.  You can access it at the link below.  I recommend testing the pattern by holding it up to your child before cutting your fabric.  Remember that this is a scaled down bib - if you have older children, they'll need something a little larger.

Fabric Choices

Bibs serve a simple purpose for infants of this age - Keeping your baby's clothing clear of spit up and drool.  But they can also be a fashion statement!  For the top layer, or "topper," see if you have anything laying around that's bright and fun for your baby - I used an adorable 100% cotton woodland animal fabric. You can also use old flannel receiving blankets.

The bottom layer, or "backer," needs to be more functional though - This means you'll need fabric that will either resist/absorb the wet stuff, or block it all together.  I picked fleece, which is water resistant, and added an inner "hidden" layer of PUL, a synthetic material that is waterproof - but that's optional and not everyone will have PUL laying around.  You can use old towels and washcloths as backers and it will work just fine.


Stacking & Pinning

Once you've got your fabric together, use the pattern to create your template for the bib and cut out your topper and backer.  Stack them up with the "right sides" facing.  We'll be sewing this together inside-out, so whatever your want showing once you're done should be on the inside of this fabric sandwich.

Once you've lined up your fabric, pin it into place.  I used fabric pins, but you can even use paperclips if you need too - just something to hold the pieces in line while you sew.  Use as many pins/clips as you need to hold everything together.  You want to make sure that the fabric is even and that nothing is bunched up.  It should look something like this:


Sew it Together

Now it's time to get sewing!  Use a quarter inch seam allowance and sew around the shape of the bib as evenly as you can - go slow if you're new at this!  Because we are turning and top stitching the bib, remember to leave a space or "hole" of at least one inch so that you can turn the bib.  Note for you newbies: As you reach any of your pins/clips, remove them so that the needle doesn't go over them (that could break the needle and is dangerous!)


Turning

This is where it can be a struggle if you aren't careful.  Because you are making the fabric "right side out" again, you need to pull the entire bib through that tiny little gap you left open.  The first hint I have for you is to "miter" your corners - Use your fabric scissors to trim down the quarter inch seam along your curves, without cutting your stitches - trust me, this is a life saver!  

The second hint for turning your bib is be sure to pull fabric from the opposite side of the bib FIRST.  It makes things a lot easier.  Try to be as gentle as you can with the fabric.  Once you've got things right side out, use a pencil or stick to gently poke at the inside of the fabric to make sure that everything has been fully turned.  It should look something like this when you're done:


Top Stitching & Closure

Now that you've got your bib fully turned, we want to top stitch the entire thing.  This will seal the one inch hole you used for your turn space, and it will make your bib retain it's shape through use and washing.  I pin the turn space during this process - make sure that you fully close that up with your top stitch!  The goal of your seam allowance on this one should be 1/8 of an inch.  Even mine was a little off in places, so take your time and go as slow as you need too!

Once your top stitch is done, the last step is your closure.  This really depends on you - I used snaps which are so easy to do that I didn't even bother taking a photo - But you can sew on a button, or sew on velcro.  Test the bib around your baby's neck first to make sure that you don't make it too snug - remember, this pattern is already scaled down for smaller babies!


You're Done!

Once the top stitching and closure are done, you're ready to use your bib!  If you're interested in my patterns for bibs made for larger babies and toddlers, let me know.  My little girl is about to grow out of this size, so I'll be retiring my collection - But they were fun and inexpensive to make!



http://topmommyblogs.com

Saturday, February 7, 2015

Guide to Natural Fabrics in Cloth Diapers

Like I've said time and time again, cloth diapering is NOT easy for the newbie cloth mom to wrap her head around (or the newbie cloth dad!).  The options are ridiculously varied and it does take a lot of trial and error to find what works for you and your baby.

One of the more confusing elements of cloth diapering are the fabric options - what's best?  What's cheapest?  Can best and cheapest be the same thing?  Are all of the options healthy for your baby's skin?

Because the options are so vast, I wanted to simply start with natural fibers - these are fabrics we're all familiar with to a certain extent, and all have a lot of great functionality when used in cloth diapering.  The most common natural fibers that you'll find available are cotton, bamboo, and hemp.  While others do exist, I like to keep things simple and these three are the staples of natural fibers in cloth diapering.
 
Cotton wins the "affordable" category - and probably will be the easiest to locate as well.  Cotton prefolds and flats are extremely common, come in organic and/or unbleached options, and are super cost effective.  Organic cotton is more expensive than bleached/processed cotton, but you can get still quite a lot of "bang for your buck" even in the organic area.

Cotton is also a very absorbent fabric once you've taken the time to properly prep the material (get the scoop on cloth diaper prep here), and is also very breathable.  "Breathable" is an important factor in cloth diapers because it means that the fabric will help to pull moisture away for baby's skin and lowers the occurrence of diaper rash.

While less readily available than cotton, bamboo is a fabric with a lot of additional benefits in cloth diapering.  Bamboo is a hypoallergenic fabric that is, in most cases, MUCH more absorbent than cotton.  This means that the parents of heavy wetters LOVE bamboo... In fact, I'll go ahead and give this fabric the win in "absorbency" for natural fibers.

This fabric is also antimicrobial and antibacterial.  This means that there is a lower chance of bad odors with bamboo, and that the fabric will help to naturally limit mildew.  Given it's high absorbency, this makes bamboo ideal for keeping moisture away for your baby and limiting diaper rash or skin infections.

Hemp is often considered to the be the champion of "durability" in cloth diapering.  This fabric can last a really long time - It is also easier to find than bamboo and many of the major cloth diaper companies offer hemp inserts and fitteds.

Breathable and absorbent, hemp is also often considered more effective for heavy wetters than cotton.  In addition to that, hemp is antimicrobial, so you'll get the benefit of limited odors with this fabric as well.

A key benefit to hemp is, however, the fact that hemp in nature is not grown in a manner that requires the use of pesticides.  This means that you don't need to worry about any nasty pesticides lingering in the fabric when you purchase (still prep this fabric, though!).


Want more "Cloth Diaper 101?"  Check out these articles from The Cozy Life:

http://topmommyblogs.com

Tuesday, January 20, 2015

All Natural Coconut & Coffee Foot Scrub

One of my biggest issues this time of year is dry skin - especially on my feet.  While there are tons of store-bought foot scrubs on the market, the best one that I've ever used is a DIY coconut oil & coffee scrub.  It only has four ingredients, and all of them are almost always in my kitchen. These ingredients are all natural and healthy for the skin - with none of the chemical toxins found in many store bought scrubs.

Combine the quarter cup of coffee grounds and tablespoon of sea salt together first in a bowl.  Once they are evenly combined, set them aside and heat your third cup of coconut oil so that it is in it's liquid form.  Heating the coconut oil doesn't necessarily require a microwave - you can set it on a windowsill in the sun to warm it up as well, depending on the climate where you live.  Be sure that the oil isn't HOT - warm is fine, but too hot might dissolve the sea salt.

Once your coconut oil is in its liquid state, combine both the teaspoon of vanilla extract and the coconut oil with the salt/coffee mixture.  Stir until it becomes a paste.  I recommend letting it sit at room temperature for 5-10 minutes at this stage so that the coconut oil can cool slightly, making the scrub firm up for application.

Fill a tub with warm soapy water and soak your feet for at least 10 minutes.  Once your skin is nice and soft from the soak, you will begin to apply the scrub - I always do this in the shower or tub - don't forget, coffee stains!  If you're applying it over a towel or on carpet, you may be causing some troublesome clean up later.

Because the scrub contains coconut oil, your feet WILL become slippery - please be careful and try to sit while applying the scrub (I usually sit on the edge of the tub for this).  You can use a scrub brush, pumice stone, or your hands depending on what you'd prefer.  I like how soft my hands feel after I apply it with my fingers, but it will also leave a coffee smell on your skin for a few hours, so it's up to you.  If you have deep cracks on your feet, it might be best to use a stone/scrubber to assist you.

Keep massaging the scrub over your skin for 5-10 minutes (or until your feet become sensitive to the exfoliation) and then rinse off with warm water.  If you have severe cracks on your feet, the coffee will have temporarily stained these a slightly darker color than the rest of your skin, so pay special attention to them when you're rinsing the scrub off.  As you continue to exfoliate and moisturize the skin on this area with scrubs and oils, these cracks should begin to lessen and you'll be able to stop worrying about them all-together!

Benefits of These Ingredients

Ground coffee: This ingredient has a lot of medicinal benefits when used in skincare products.  First, and a key benefit for this scrub, is that it exfoliates the skin.  It can also reduce inflammation and swelling.  I tend to avoid using coffee grounds to exfoliate my face because it's a bit harsh for me, but I know many women who have used it to aid in lessening under-eye puffiness. 

Coconut Oil: This is a natural moisturizer that conditions your skin.  It moisturizes without impacting your skin's natural oil production, and helps to avoid the premature aging.  Coconut oil is also filled with natural proteins that can repair skin damage - this is important for use with a scrub like this one because it will keep your skin from feeling irritated while you exfoliate.

Sea Salt: This is a natural detoxifier that draws out toxins present in the skin.  It will also exfoliate your skin as well, whether you use "fine" or "coarse" sea salt.  For use on feet or elbows, I recommend coarse sea salt - if using anywhere else on the body, use "fine" sea salt in order to avoid skin irritation.

Pure Vanilla Extract: This serves as an antioxidant and skin protectant.  It promotes healthy skin and helps to prevent damage from toxins and pollutants.  Plus, it smells amazing.

A Few Things To Keep In Mind

  • If you are pregnant, coffee scrubs of any kind DO contain caffeine and, as I've said many times, the skin is an organ, so it WILL absorb the caffeine into your body if used.  I've had several conversations with my doctor about the pros and cons, and while he has no problem with me using the scrub during my pregnancy, I've decided to skip it until the baby is born. 
  • Decaffeinated coffee grounds will NOT work as intended, given that the benefits of coffee grounds are due much in part to the caffeine they contain.  Also, decaffeinated grounds are highly processed, so I would recommend avoiding them due to the chemicals they may contain.

http://topmommyblogs.com

Friday, January 16, 2015

Skincare Review: Simple Smoothing Facial Scrub

The "budget" brand Simple® is one I've seen on a few different YouTube "beauty guru" videos and I've been wanting try their stuff out for a while - On their website, it's explained that "all Simple® products have no dyes, artificial perfumes or harsh irritants that can upset skin and contain skin-loving ingredients and added vitamins for natural, healthy-looking skin."  I was at the store about a week ago and decided to pick up their facial scrub to give it a shot.


What's in it?


We'll start with the big question - is this product "safe" and devoid of the "dirty dozen" chemicals commonly found in cosmetic and beauty products?  Unfortunately the answer is no.  It contains three different chemicals that I'm not too happy about:
  1. Sodium Hydroxymethylglycinate, which is a formaldehyde releaser,  can cause cancer, and is an allergen.  
  2. Methylparaben, an endocrine disruptor that is also a known allergen.
  3. Tocopheryl Acetate, which is fine alone and is advertised simply as "Vitamin E."  However, this form of Tocopheryl carries the risk of contamination with Hydroquinone, which is actually banned from use in cosmetics - it's a super nasty compound that can cause organ toxicity, cancer, and allergies.
In the grand scheme of things, is this a product I'd avoid?  Considering what's in most skincare products, this one isn't all that bad.   Many others, like the Clean & Clear Morning Burst Facial Cleanser and the OXY Daily Defense Exfoliating Face Scrub for example, present many more toxins and health risks.  

However, because there are many, many DIY exfoliating cleanser recipes out there that use zero chemicals, I probably wouldn't repurchase this one.  I'm aiming to remove as many avoidable chemicals from my beauty routine as possible, and scrubs a great opportunity to eliminate toxins.

Does it work?

Equally as important as what's in it, does this product actually work?  I'll be honest - It really does work well on my skin.  The packaging instructs the user to only use the product once every few days, and when I used it, my skin was left feeling super soft.  I haven't noticed any increased redness or irritation, which I typically see with store-bought exfoliating products.  The exfoliating beads are also smaller than those found in most other products I've tried, which creates a nice scrub without the "scratchy" feeling.

Would I recommend it?  DIY Options?

Probably not.  Like I said, scrubs are a great opportunity to eliminate toxins.  If you're going to try your hand at DIY skincare, they would be a great start - go on Pinterest and you'll find a million different options, several of which I've tried with a lot of success... and they're typically super cheap and easy to make.  Homemade facial scrubs can even be customized to your skin type, as you can learn here.
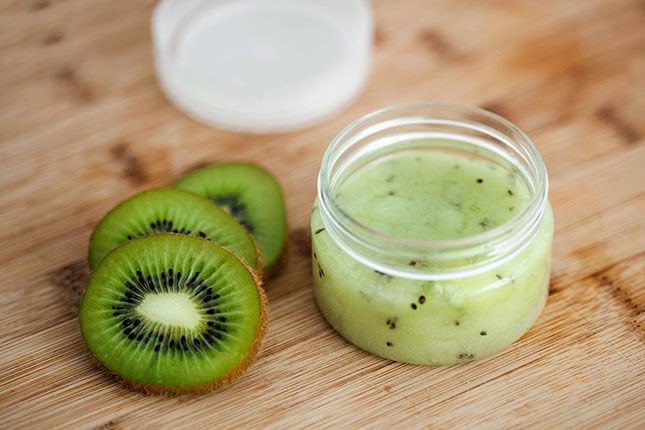
Image (c) Brit+Co


http://topmommyblogs.com


http://topmommyblogs.com

Monday, January 12, 2015

The Scoop on Baby Wipes

I've been so focused on building a cloth diaper stash that wipes have taken a bit of a backseat to getting in the more "fun" diapering purchases.  But, with only five weeks left before Cozy Baby #2 gets here, it's time to consider baby wipes and our options.  To make things easier on myself, I'm separating baby wipes into four basic categories:

In considering the pro's and con's, a few of these really stick out to me... and I'm sure that you're likely assuming that I'm leaning toward the cloth ones, right?  Well, let's see:

Traditional Disposable Wipes

There are SO many different brands of disposable wipes that it would be extremely difficult to go over every option out there, so let's keep this basic: Brands like Pampers and Huggies have entire lines of wipes - normal, scented, unscented, sensitive skin, and even "natural."  Typically these types of wipes sell at a rate of $0.02-$0.05 per wipe.

The problem with more traditional (and readily available) baby wipes are the chemicals in them - which may include alcohol, perfume, chlorine, pthlalates, parabens, and dioxin.  These can be really harmful to your baby's skin - and result in the absorption of toxins into their bodies that could potentially cause hormonal issues and some forms of cancer.

Eco-Friendly Disposable Wipes

There are now a number of eco-friendly disposable wipes on the market that are safe for the environment, biodegradable and/or flushable.  These brands are typically harder to find and more expensive than more traditional disposable brands, averaging $0.05-$0.10 per wipe.  Popular brands include Seventh Generation and Earth's Best.

However great the word "biodegradable" might sound, and how nice "safe for the environment" seems, these wipes aren't necessarily good for your baby.  Many of these still contain alcohol, which can irritate baby's skin.  The majority are paraben, chlorine, and pthlalate-free though, which does make them the "lesser of two evils" in the great world of disposable wipes.

Name Brand Cloth Wipes

Many of the popular cloth diaper companies also have their own line of cloth wipes made out of various fabrics - flannel, cotton, hemp, and microfleece to name a few.  Popular brands for this option are Thirsties, bumGenius, and BabyKicks.  Much pricier per-wipe than their disposable counterparts, these wipes can cost anywhere from $1.00-$2.00 per wipe.

So why invest that much money into a wipe?  Simple - these are reusable.  They require the same washing routine as cloth diapers and contain zero chemicals that might harm your baby.  A single wipe could last you the entire 2.5 years that your baby is in diapers.

DIY Cloth Wipes

Cloth wipes don't need to be fancy name brand purchases.  In fact, soft baby washcloths or recycled washcloths/towels you already have in your home would do just fine as cloth wipes.  The thing to keep in mind is that your baby's skin will be sensitive, so don't select anything that has overly-rough fabric that might irritate your baby - and don't forget that microfiber isn't a fabric that can go directly onto baby's skin!  We have several MF cloths laying around the house and these are definitely not meant to be used on skin (for us or a baby).  Stick with natural fabrics - cotton and flannel are probably the easiest to find.

If utilizing washcloths you already own, this type of baby wipe could be completely free.

There is one "catch" with cloth wipes, though - they aren't a standalone product.  You do need to purchase additional items in order to make your name brand or DIY wipes work for you and your baby.

The most basic accessories are water and a spray bottle - your wipes need to be dampened prior to use, and water works just fine for this.  At home, the spray bottle might not be necessary - when you're out and about, a small travel-sized spray bottle with water in it will do the trick.

Also required for "on the go" cloth wipes, as with cloth diapers, is a wet bag to hold any used wipes.  This doesn't need to be fancy, but many different options are on the market for "cute" wet bags... though a ziploc bag will do in a pinch, products specifically labeled as "wet bags" are washable, and thus reusable.

Optional accessories include a wipe solution if you aren't comfortable with just using water (there's a great one available by bumGenius) and a wipe warmer if you'd like prepped wipes available for immediate use.  Wipe solution and a wipe warmer are options that I'm passing on for now, but many moms find them to make the whole process more convenient. 
http://topmommyblogs.com

Thursday, January 8, 2015

DIY or Buy? Cloth Diaper Detergent

I had a lot of questions when I first committed to cloth diapering. Among those were the issue of washing your diapers - Can I use normal detergent?  If not, what do I need to make my own?  Will it be expensive?

Can I use normal detergent?

The answer to this is both yes and no.  Some readily available detergent brands offer options that are okay for cloth diaper use.  Others don't.  So what do you look for?

Avoid: Brighteners, Fabric Softeners, Dyes, Fragrances, and Enzymes
Brighteners purposefully leave behind a chemical residue in order to absorb light to make fabrics brighter, but this can cause skin irritation.  Fabric softeners are another component of detergents that, on purpose, leave behind residue - this time for making fabric feel softer.  However, fabric softeners also have the side-effect of causing fabrics to become water resistant - this can ruin the absorbancy of your diapers, effectively making them useless.  Dyes and fragrances in detergent are another potential source of skin irritation from harsh chemicals - and they are bad for the environment!  Finally enzymes, used as stain removers, can inadvertently attack your baby's skin if residue is left on your diapers due to their ability to breakdown organic materials.

Common detergents safe for use with cloth diapers
Some "free and clear" options from major detergent brands can be okay for use, though not ideal.  Many of them contain brighteners and/or fragrances, despite the "free and clear" label.  However, there are a few detergents that can work really well - like Arm & Hammer Essentials Free, which is free of dyes, phosphates, bleaches and fragrances.

What do I need to make my own cloth diaper detergent?

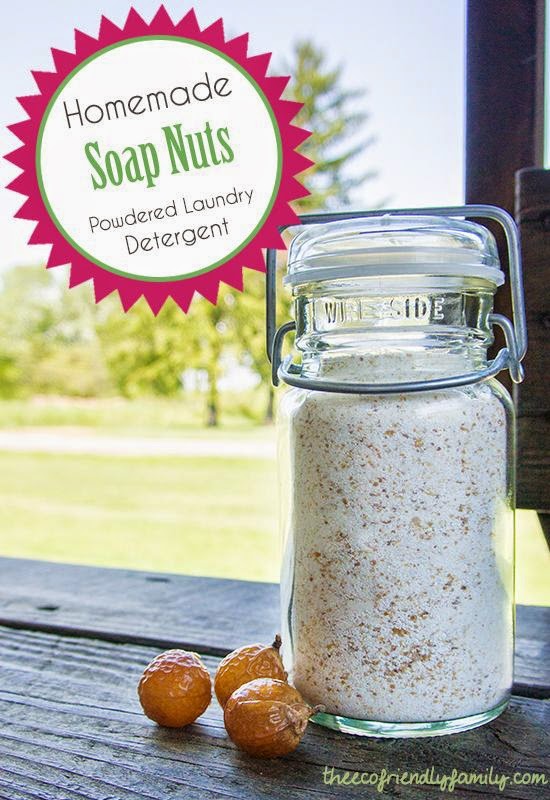
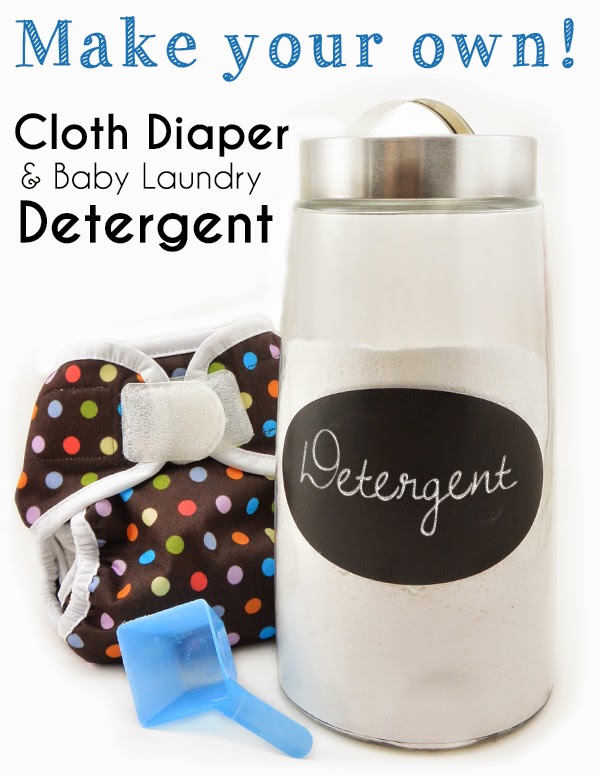
There are a lot of DIY recipes out there for cloth diaper use - many of which utilize very few ingredients and can be made easily at home.  The basic items in most of these detergents may include washing soda, borax, and baking soda.  Occasionally you'll see options that include the use of essential oils or other natural products as well.  Here are a few resources from The Eco-Friendly Family to check out and see if you'd be interested in trying your hand at DIY detergent:
http://theecofriendlyfamily.com/2013/05/diy-powdered-soap-nuts-laundry-detergent-recipe/ http://theecofriendlyfamily.com/2009/08/cloth-diaper-detergent/#_a5y_p=2872639
Images (c) The Eco-Friendly Family

Will cloth diaper detergent be expensive?

It doesn't have to be.  You can certainly buy a boutique-brand detergent from a specialty store and end up paying a fortune for your cloth diaper detergent - However, most cloth diaper detergents aren't expensive at all.  DIY detergent can cost as little as $30 for 5 gallons of powder detergent that can last up to a year.  Brands like bumGenius offer cloth diaper detergent that costs under $15.00 for a supply estimated to last for 60-70 wash cycles.  Arm & Hammer Essentials Free is below the $10.00 mark for 50fl oz. 

So... DIY or Buy?

That's up to your personal preference - I've always been attracted to the idea of DIY detergent, but Cozy Hubby isn't comfortable with it, worrying that it won't sufficiently clean what we need it to clean.  Bottom line - Do what's best for you, your baby, and your diapers!

http://topmommyblogs.com