Tuesday, January 20, 2015

All Natural Coconut & Coffee Foot Scrub

One of my biggest issues this time of year is dry skin - especially on my feet.  While there are tons of store-bought foot scrubs on the market, the best one that I've ever used is a DIY coconut oil & coffee scrub.  It only has four ingredients, and all of them are almost always in my kitchen. These ingredients are all natural and healthy for the skin - with none of the chemical toxins found in many store bought scrubs.

Combine the quarter cup of coffee grounds and tablespoon of sea salt together first in a bowl.  Once they are evenly combined, set them aside and heat your third cup of coconut oil so that it is in it's liquid form.  Heating the coconut oil doesn't necessarily require a microwave - you can set it on a windowsill in the sun to warm it up as well, depending on the climate where you live.  Be sure that the oil isn't HOT - warm is fine, but too hot might dissolve the sea salt.

Once your coconut oil is in its liquid state, combine both the teaspoon of vanilla extract and the coconut oil with the salt/coffee mixture.  Stir until it becomes a paste.  I recommend letting it sit at room temperature for 5-10 minutes at this stage so that the coconut oil can cool slightly, making the scrub firm up for application.

Fill a tub with warm soapy water and soak your feet for at least 10 minutes.  Once your skin is nice and soft from the soak, you will begin to apply the scrub - I always do this in the shower or tub - don't forget, coffee stains!  If you're applying it over a towel or on carpet, you may be causing some troublesome clean up later.

Because the scrub contains coconut oil, your feet WILL become slippery - please be careful and try to sit while applying the scrub (I usually sit on the edge of the tub for this).  You can use a scrub brush, pumice stone, or your hands depending on what you'd prefer.  I like how soft my hands feel after I apply it with my fingers, but it will also leave a coffee smell on your skin for a few hours, so it's up to you.  If you have deep cracks on your feet, it might be best to use a stone/scrubber to assist you.

Keep massaging the scrub over your skin for 5-10 minutes (or until your feet become sensitive to the exfoliation) and then rinse off with warm water.  If you have severe cracks on your feet, the coffee will have temporarily stained these a slightly darker color than the rest of your skin, so pay special attention to them when you're rinsing the scrub off.  As you continue to exfoliate and moisturize the skin on this area with scrubs and oils, these cracks should begin to lessen and you'll be able to stop worrying about them all-together!

Benefits of These Ingredients

Ground coffee: This ingredient has a lot of medicinal benefits when used in skincare products.  First, and a key benefit for this scrub, is that it exfoliates the skin.  It can also reduce inflammation and swelling.  I tend to avoid using coffee grounds to exfoliate my face because it's a bit harsh for me, but I know many women who have used it to aid in lessening under-eye puffiness. 

Coconut Oil: This is a natural moisturizer that conditions your skin.  It moisturizes without impacting your skin's natural oil production, and helps to avoid the premature aging.  Coconut oil is also filled with natural proteins that can repair skin damage - this is important for use with a scrub like this one because it will keep your skin from feeling irritated while you exfoliate.

Sea Salt: This is a natural detoxifier that draws out toxins present in the skin.  It will also exfoliate your skin as well, whether you use "fine" or "coarse" sea salt.  For use on feet or elbows, I recommend coarse sea salt - if using anywhere else on the body, use "fine" sea salt in order to avoid skin irritation.

Pure Vanilla Extract: This serves as an antioxidant and skin protectant.  It promotes healthy skin and helps to prevent damage from toxins and pollutants.  Plus, it smells amazing.

A Few Things To Keep In Mind

  • If you are pregnant, coffee scrubs of any kind DO contain caffeine and, as I've said many times, the skin is an organ, so it WILL absorb the caffeine into your body if used.  I've had several conversations with my doctor about the pros and cons, and while he has no problem with me using the scrub during my pregnancy, I've decided to skip it until the baby is born. 
  • Decaffeinated coffee grounds will NOT work as intended, given that the benefits of coffee grounds are due much in part to the caffeine they contain.  Also, decaffeinated grounds are highly processed, so I would recommend avoiding them due to the chemicals they may contain.

http://topmommyblogs.com

Monday, January 19, 2015

When Life Throws You Lemons...

You can finish that phrase, right?  We're all supposed to make lemonade... right?  Well, sometimes us moms are thrown an excessive amount of lemons and the amount of lemonade needed under those circumstances would quench the thirst of a small island nation...  Staying positive and learning to "roll with the punches" as a parent takes a lot of trial and error, patience, and the occasional glass of wine (if you're into that sort of thing).

So what can we do?  Regardless of the situation, how can we moms turn lemons into lemonade, gain the respect of our children, and go to bed knowing that we're doing a kickass job as a parent?

Avoid The Rage

Growing up, both of my parents were "yellers."  We knew when we'd done something wrong because they made sure that we HEARD their anger.  I love my parents a great deal, but a lot of my built-in behaviors from childhood stem from a certain amount of fear - Fear of their anger, fear of them screaming at me, fear of getting into trouble.  In fact, I still eat all of the food off of my plate at EVERY meal because of the built-in fear I have at leaving the table before I've cleaned my plate - it's a habit I just can't kick, even if it gives me a stomach ache.  It was one of my mother's biggest pet-peeves.

Now that I have a child of my own and another on the way, it's important to me that I avoid the "rage" that I remember from the house I grew up in.  When my son does something that frustrates me, I take a step back and reign in any anger before I address the issue.  I usually ask him to go to his room while I process my thoughts, and then go in to talk with him once I'm calm and collected.  Yes, occasionally I slip up and I might raise my voice a little - I'm not perfect and will never claim to be.

We are firm with our son and he knows that he has limits - but I make a conscious effort to establish those limits in a way that makes him look to me as someone he trusts and respects, not someone who should be feared.

Don't Expect Perfection

I think that most moms view their children as "perfect" when they're born - these adorable little creatures that are the physical representation of our love... But they aren't perfect.  They never will be.  It's unfair to hold our children to a standard of perfection that they will never come close to reaching.

Think back to your own childhood and all of the things that you did, knowing they were wrong or that you shouldn't be doing, yet you did them anyway... Yeah - you were a bad kid sometimes, huh?  It's only normal to expect that our kids will have those same impulses and will occasionally get into trouble for one thing or another.

It's our job as parents to guide our children and raise them with morals and values that will help them in their decision-making as they get older.  Teach your kids the difference between "fun" and "stupid" - let them know that their actions will have consequences.  Talk to them when they get into trouble and try to figure out what motivated them to do whatever it was they did so that it can be avoided in the future.

...and it must be said - don't hold yourself to perfection either.  We'll make mistakes as parents.  It's going to happen, whether you're a first-time mom or the mother of ten kids.  Don't beat yourself up if your make a mistake - just take it day by day and learn, along with your child, on how to set your boundaries and love each other to the fullest.

Be Consistent

When you're angry with your child over something they did or said, it's important that we moms are consistent in our discipline.  If we're wishy-washy and never follow through with consequences, our kids will never grow to respect our guidance and follow the rules of our homes. 

It's also really hard on you as parent to flip-flop the rules and constantly make exceptions - you'll grow just as confused as your kids are.  By creating a solid and firm set of guidelines for our kids to follow and raising our children to know what to expect from us, we're going to save ourselves A LOT of headaches.

Consistency also needs to exist between mom and dad - having a different set of rules depending on which parent is home is NOT healthy.  I know this because that's how it was in my house.  This gave my sisters and I the chance to "get away" with things and avoid the consequences - we worked the system and took advantage of it whenever we could.  Communication between parents is key here - don't let the problem spiral out of control.


http://topmommyblogs.com

Sunday, January 18, 2015

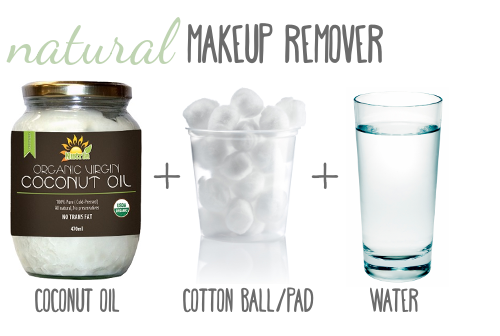
Natural Makeup Remover: Coconut Oil

I talk a lot about what we put onto our skin, but sometimes the harder question to answer is how to take it off - many cleansers and makeup removers on the market are filled with harsh chemicals and strip our skin of essential oil, making our skin super dry or even oily depending on the products we use.  This causes premature aging, and can change the way our skin produces oils.  One claim you'll see on many makeup removers and cleansers is "Oil Free" - don't consider this to necessarily be a good thing.

Oils, in their natural form, can actually really help our skin to retain moisture and stay youthful.  Which is why I use an oil - just one, nothing else - to clean my face off and remove my makeup every single day.  In fact, this way actually eliminates the need to moisturize my skin with facial lotions as well, helping me to save a ton of money in the process.  Here's the trick:

How It Works

Coconut Oil is truly a miracle ingredient - you can cook with it, wash your hair with it, and clean your face with it - among other things.  In addition to being versatile, it's also really cheap and super easy to find. 

When using Coconut Oil as a makeup remover, you simply need to scoop up a small handful (generally about 1/8 cup for me does the trick) and apply it to your face.  I live in California so my oil typically is somewhere in between solid and liquid, so I warm it up by rubbing my hands together and turning it fully into the liquid form - if you live in a colder climate, you will definitely need to use your hands to turn the solid oil (which is white in color) into the liquid form.  Rub the oil into your skin with your fingertips, anywhere that you have applied makeup.  I even use it on my eyelids without any problems.


The purpose of using a cotton ball or cotton pad is to wipe away the majority of the coconut oil once you've applied it.  This is when the makeup actually comes off - you'll see the makeup residue ALL OVER your cotton pad, so be sure that you're thorough and get as much of the oil off as you can.  I tend to focus more on gently wiping off my eyes, as mascara and eye shadow can take a few extra swipes to fully come off.


The final step is using warm water (tap water works fine for me, but you can always buy distilled or filtered water if you'd prefer) to rinse your skin off.  There is always a small amount of coconut oil left on the skin following this rinse - But that's actually a good thing.  Pat your skin dry (don't rub) and then use your hands to massage the remaining coconut oil evenly into your skin.  This acts like a moisturizer and ensures that your face doesn't feel dry following the removal of your makeup.

Saturday, January 17, 2015

The Importance of Cloth Diaper "Prep"

If you've looked into cloth diapering, even just a little bit, "prepping" is probably a term you've seen A LOT of.  But what does it mean and why is it so important?

What is "Prepping?"

Cloth diaper prep is, simply put, the process in which you take a brand new diaper and prepare it for use.  Depending on the type of diaper and the fabric involved, the actual process of prepping your diapers will vary.  What does NOT vary is the fact that some form of prep should take place - covers, AIO's, AI2's, pockets, fitted's, prefolds, flats, inserts, soakers, doublers, etc. should be prepped before you put them on your baby.

I'll do my best to keep things simple, so I'll just add that "prepping" a diaper for use involves WASHING that diaper, usually multiple times, prior to actually using it.  This washing process increases the absorbency of your diapers and cleanses them of any irritants left over from the manufacturing process.  So... How do you prep a cloth diaper?

Like I said, it varies.  A great deal of this variance is related to the fabric of your diapers.  If you want to keep the thought process simple, you can (with a few exceptions) say that diapers made of natural fibers are prepped differently from those made with synthetic material.

Natural Fibers

When I say "natural," I mean fabrics like hemp, bamboo, cotton, etc - These have a naturally occurring oil in the fabric when you purchase the material new.  This oil makes the fabric more water resistant, which is something you do NOT want your diaper to be.  When prepping these kinds of natural materials, you'll want to wash this oil out of the fabric through repeated washes.  The prepping process is also training the material to absorb liquid, which makes it more effective as a diaper.
Cotton and hemp are also popular materials for prefolds - this type of cloth diaper requires a lot of prep in order to get the fabric ready for use, specifically related to absorbency.  When you buy a brand new prefold, it looks like a very thin sheet of fabric - by washing your prefolds multiple times, a process called "quilting" occurs, where the fabric of the prefold begins to thicken up and increases in absorbency.

Synthetic Fibers

When you consider man-made materials used in cloth diapering - like microfiber, TPU (thermoplastic polyurethane), or PUL (polyurethane laminate) - the prepping process is less "involved" than with natural materials.  Because these are man-made materials, they do not have any "naturally occurring" oils to worry about and they are engineered to be absorbent from the get-go - these materials just need to be cleansed.
 Because these materials are man-made, however, you do need to pay attention to your method of washing these.  TPU, for example, is recommended for washing only in medium/low temperatures.  PUL, however, can be washed in high temperatures.

How many times should I wash my diapers before use?

To a certain extent, these numbers are up for debate.  Some would recommend more, others less.  However, it should be mentioned that your prefolds and fitted's will continue to gain absorbency for a little while through use - so don't give up on a diaper if it's not 100% absorbent immediately after prep.  Overnight use with a new diaper might also be tricky, so be sure to plan ahead with extra absorbency layers to accommodate.

I also recommend drying between wash cycles - many mom's will say not to bother and just use repeated washes with a dry at the very end - Again, it's up to you and what you're comfortable with. 
  • Prefolds: 4-6 washes, dry in between
  • Natural Fiber Inserts: 2-3 washes, dry in between
  • Fitted: 2-3 washes, dry in between
  • Synthetic Pockets: 1 wash
  • Synthetic AIO's and AI2's: 1 wash
  • Synthetic Inserts: 1 wash
  • Synthetic Covers: 1 wash  

How hot should the water be?  Detergent?

Generally speaking, prep should be done with hot water.  However, like I mentioned before, there are some synthetic materials that are not meant for use with super hot water, so please read manufacturer labels!  With your natural fibers, though - HOTTER IS BETTER.

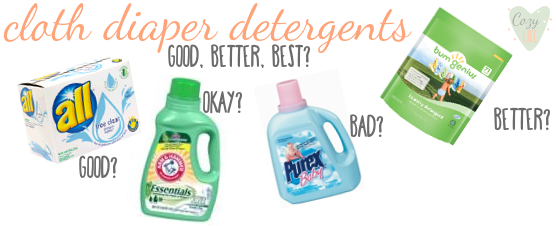
As far as detergent goes, use some during your first wash cycle for cleansing purposes - after that, it's not really necessary.  Prepping for absorbency has more to do with the actual water making it's way into the fabric - not the detergent.  But, if you want detergent during all cycles, that's okay too.  Just be sure that you're using a detergent that is safe for cloth diapers.  For more information on detergents, click here to see why not all detergents were created equally!
http://amcozy.blogspot.com/2015/01/diy-or-buy-cloth-diaper-detergent.html

Can I boil my diapers?

I've never been a fan of this method, simply because it's labor-intensive and I'm ALL for easy! "Work smarter, not harder," as my mom always said!  However, there are some women that swear by this method - so we'll agree to disagree.

If you are interested in boiling, you definitely can, but only if they are 100% natural materials - like cotton and hemp prefolds or flats.  Please, please, please - do NOT boil anything with a pull, or velcro, or snaps, etc.  You run the risk of ruining the diaper AND causing a huge mess.  Once you're sure that the diaper is okay to boil, the basic process is fairly easy - When boiling, put the material on the stove for 15-30 minutes and follow this by putting diaper in the washer for one cycle before use.
http://topmommyblogs.com

Friday, January 16, 2015

Skincare Review: Simple Smoothing Facial Scrub

The "budget" brand Simple® is one I've seen on a few different YouTube "beauty guru" videos and I've been wanting try their stuff out for a while - On their website, it's explained that "all Simple® products have no dyes, artificial perfumes or harsh irritants that can upset skin and contain skin-loving ingredients and added vitamins for natural, healthy-looking skin."  I was at the store about a week ago and decided to pick up their facial scrub to give it a shot.


What's in it?


We'll start with the big question - is this product "safe" and devoid of the "dirty dozen" chemicals commonly found in cosmetic and beauty products?  Unfortunately the answer is no.  It contains three different chemicals that I'm not too happy about:
  1. Sodium Hydroxymethylglycinate, which is a formaldehyde releaser,  can cause cancer, and is an allergen.  
  2. Methylparaben, an endocrine disruptor that is also a known allergen.
  3. Tocopheryl Acetate, which is fine alone and is advertised simply as "Vitamin E."  However, this form of Tocopheryl carries the risk of contamination with Hydroquinone, which is actually banned from use in cosmetics - it's a super nasty compound that can cause organ toxicity, cancer, and allergies.
In the grand scheme of things, is this a product I'd avoid?  Considering what's in most skincare products, this one isn't all that bad.   Many others, like the Clean & Clear Morning Burst Facial Cleanser and the OXY Daily Defense Exfoliating Face Scrub for example, present many more toxins and health risks.  

However, because there are many, many DIY exfoliating cleanser recipes out there that use zero chemicals, I probably wouldn't repurchase this one.  I'm aiming to remove as many avoidable chemicals from my beauty routine as possible, and scrubs a great opportunity to eliminate toxins.

Does it work?

Equally as important as what's in it, does this product actually work?  I'll be honest - It really does work well on my skin.  The packaging instructs the user to only use the product once every few days, and when I used it, my skin was left feeling super soft.  I haven't noticed any increased redness or irritation, which I typically see with store-bought exfoliating products.  The exfoliating beads are also smaller than those found in most other products I've tried, which creates a nice scrub without the "scratchy" feeling.

Would I recommend it?  DIY Options?

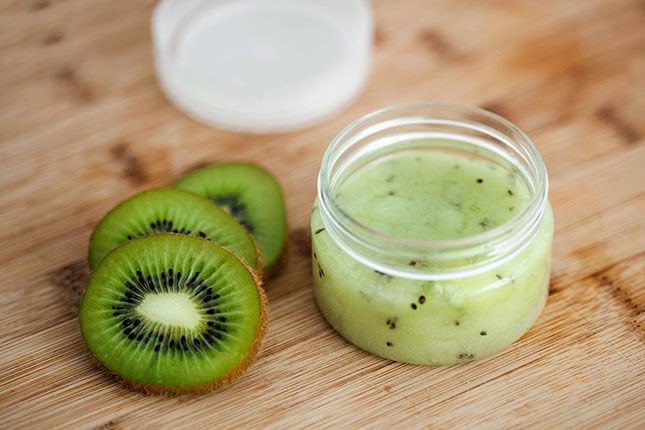
Probably not.  Like I said, scrubs are a great opportunity to eliminate toxins.  If you're going to try your hand at DIY skincare, they would be a great start - go on Pinterest and you'll find a million different options, several of which I've tried with a lot of success... and they're typically super cheap and easy to make.  Homemade facial scrubs can even be customized to your skin type, as you can learn here.
Image (c) Brit+Co


http://topmommyblogs.com


http://topmommyblogs.com